Dice
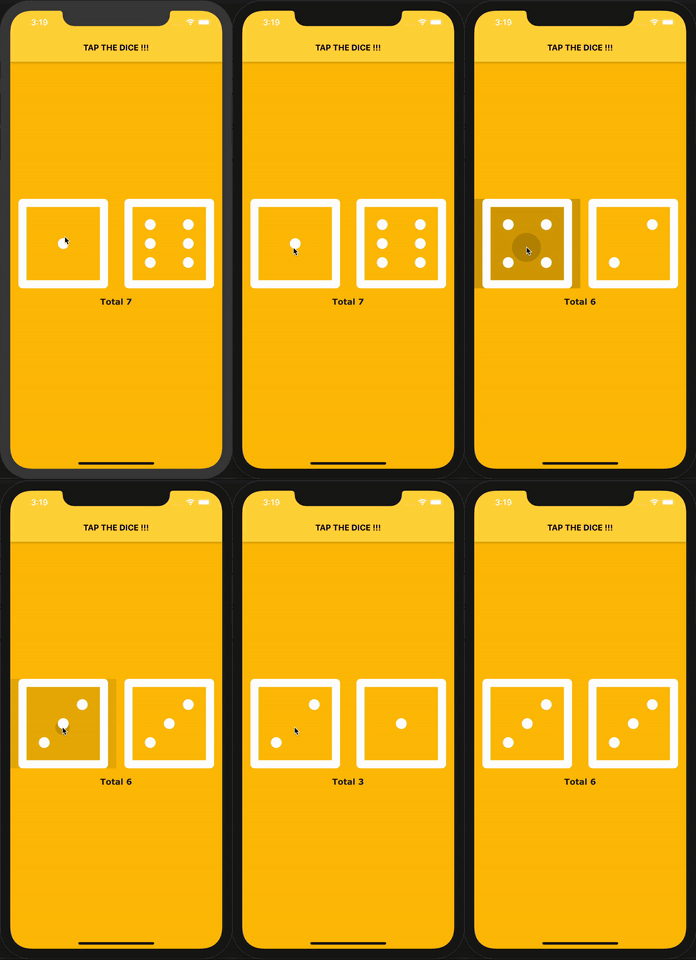
In this example, we will build a fun dice app. You can make the dice roll at the tap of a button and a random count is generated with every roll of dice.
info
See the complete code here.

Store setup
The DiceCounter store is quite simple. It keeps a track of dice values and the total count. Below is how it looks:
- Generate
dice_counter.g.dartfile usingbuild_runnerand this must be imported into the store. Read more aboutbuild_runnerin the MobX Code Generation library,.
import 'dart:math';
import 'package:mobx/mobx.dart';
part 'dice_counter.g.dart';
class DiceCounter = _DiceCounter with _$DiceCounter;
abstract class _DiceCounter with Store {
int left = Random().nextInt(6) + 1;
int right = Random().nextInt(6) + 1;
int total;
void roll() {
left = Random().nextInt(6) + 1;
right = Random().nextInt(6) + 1;
total = left + right;
}
}
- In the above store
leftandrightare the dice counts defined with@observableannotations and are initialised with a random number ranging from 1 - 6. totalis also an observable which keeps track of the total count of the dice.- The action-method
roll()defined with@actionannotation is used to update the dice counts every time user taps on the dice.
With the above implementation I was able to keep a track of the left, right and total counts with every user interaction as expected or so I thought 🤔.
Discovering
@computed
I ran into an issue... The total count was null for the very first time. It gets updated only when the action-method roll() is called.
In search of the solution I went through the documentation and few examples and realised there is an insanely easy way to get around this issue.
@computedBOOM! my issue is solved.
I have modified the above DiceCounter implementation using @computed.
import 'dart:math';
import 'package:mobx/mobx.dart';
part 'dice_counter.g.dart';
class DiceCounter = _DiceCounter with _$DiceCounter;
abstract class _DiceCounter with Store {
int left = Random().nextInt(6) + 1;
int right = Random().nextInt(6) + 1;
int get total => left + right;
void roll() {
left = Random().nextInt(6) + 1;
right = Random().nextInt(6) + 1;
}
}
- Now
totalis a computed observable annotated with@computed. Computed observables are in-sync every time left or right count is updated. - The value of
totalis automatically updated when the instance of the store is created so I no longer have thenullvalue when I load the app. @computeddoes more than that. Now, I do not have to write any additional code like the above in the action-method to update it.
It exactly does what the author of mobx quoted... "What can be derived, should be derived. Automatically".
Integrating the Store with the View
Now that the DiceCounter store is ready, it's time to add it to the Widget to see the magic happen. Let's create an instance of our store:
import 'package:flutter/material.dart';
import 'package:flutter_mobx/flutter_mobx.dart';
import 'dice_counter.dart';
final diceCounter = DiceCounter();
The observables and actions from the store can be accessed via the newly created instance diceCounter along with the Observer widget as shown below:
class DiceView extends StatelessWidget {
Widget build(BuildContext context) {
final diceCounter = Provider.of<DiceCounter>(context);
return Center(
child: Column(
mainAxisAlignment: MainAxisAlignment.center,
children: <Widget>[
Row(
children: <Widget>[
Expanded(
child: TextButton(
child: Observer(
builder: (_) =>
Image.asset('images/dice${diceCounter.left}.png'),
),
onPressed: diceCounter.roll,
),
),
Expanded(
child: TextButton(
child: Observer(
builder: (_) =>
Image.asset('images/dice${diceCounter.right}.png'),
),
onPressed: diceCounter.roll,
),
),
],
),
Padding(
padding: const EdgeInsets.all(16),
child: Observer(
builder: (_) => Text(
'Total ${diceCounter.total}',
style: const TextStyle(
fontWeight: FontWeight.bold,
color: Colors.black87,
fontSize: 16,
fontFamily: 'Verdana'),
),
),
),
],
),
);
}
}
Summary
The working example will be as seen in the figure below:

info
See the complete code here.